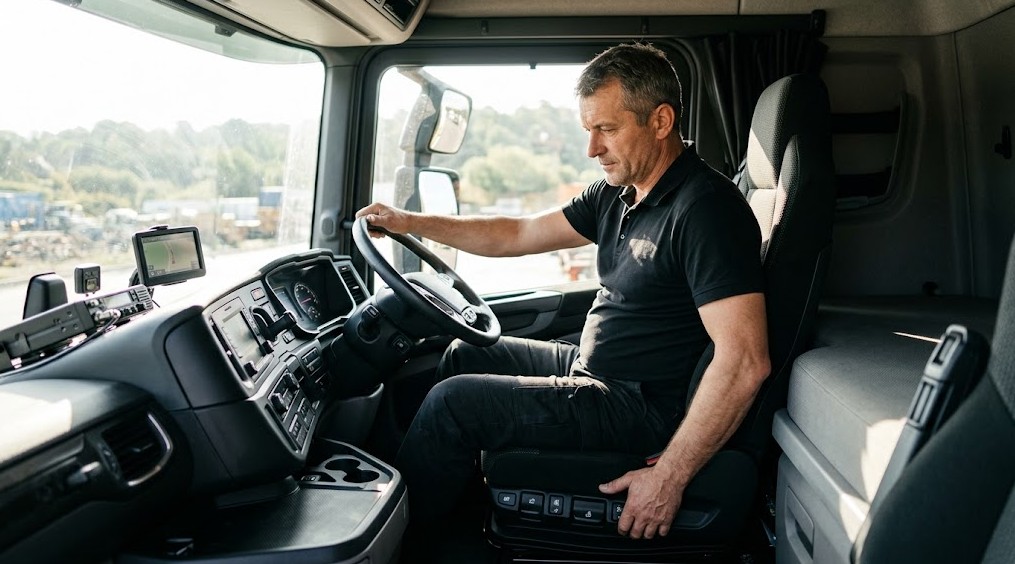
When you spend nine hours a day on the road, the constant vibration and awkward posture quietly challenge your back, sometimes more than you’d realize right away. Your truck seat is much more than just a place to sit; it functions as a dependable health safeguard, designed by companies like GRAMMER and ISRI to help prevent problems such as back pain, sciatica, and lingering neck discomfort. With a few well-chosen adjustments, your truck’s cabin can be set up as an ergonomic workspace, giving your body the ongoing support it needs throughout your career.
Step 1 ( Setting the height and pneumatic suspension
Right from the start, making careful changes to the seat height and pneumatic suspension (especially on seats built by GRAMMER or ISRI) has a powerful effect. These changes are some of the most effective ways to minimize jolts from the road, which, if ignored, can quietly place your spine at risk.
Calibrating for leg relief and shock absorption
The typical approach for getting your legs and seat working together often goes something like this:
- Set the height: Adjust your seat so your hips come out just a bit higher than your knees, forming roughly a 95 to 100-degree hip angle. This slight rise feels odd at first but lifts strain from your lower back.
- Check pedal reach: Confirm that you can move the pedals with your whole foot without lifting your heels; your knees should stay comfortable, and your thighs shouldn’t feel squeezed or pressured.
- Calibrate the air suspension: Carefully set the air pressure so the seat’s movement absorbs bumps, giving you about 100 millimetres of gentle travel up and down.
- Verify the float: The ride should feel as if your seat is riding a soft wave, absorbing vibration while keeping you off the hard stops.
While every seat responds a bit differently, these basics generally help most drivers.
Step 2 ( Seat pan depth: protecting leg blood flow
If the seat cushion depth is just a bit off, it can press behind your knees and slow down blood flow, sometimes leading to tired legs or, rarely, more serious issues like deep vein thrombosis. Paying attention to the leg blood flow as you adjust the seat is not optional if you want to keep your legs feeling lighter during long runs.
The two-finger rule
Actually, one of the simplest ways to check is to use your hand:
- Sit back so your lower spine is supported by the seat’s lumbar area.
- Slide a couple of fingers or so between the seat’s edge and the back of your knee.
- Ideally, there should be a space of around 3 to 5 centimetres, a gap about the width of two to three fingers.
Getting this gap right means your blood keeps circulating smoothly, your legs relax, and numbness or tingling should be much less common.
Step 3 ( Backrest incline and the 100-degree rule
Many people still believe that sitting bolt upright at 90 degrees is ideal, but that position can actually create hidden pressure on your lower back. The truth is, your spine does best when it can settle into a natural curve instead of being forced upright.
Finding the optimal recline
Ideally, set your backrest incline between 100 and 110 degrees. Here’s why that range is so effective:
- Relieves direct pressure on your lower back’s discs and connective tissues.
- Lets your spine keep its gentle, healthy curve (the natural lordosis).
- Keeps your vision of the road and mirrors clear and unobstructed, which is vital for safety.
- Ensures the seat belt fits as intended, firmly across your hip bones and chest, not riding up or down.
This small change is one of those adjustments that feels minor but pays big dividends in comfort.
Step 4 ( Pneumatic lumbar support alignment
If you skip adjusting the lumbar support, you might notice back fatigue and tension creeping in after only a few hours. Modern seats from companies like ISRI often come outfitted with dual pneumatic controls; these act a bit like a physical therapist, giving very specific support where your spine naturally curves inward.
Shaping the lumbar cushion
- Find the four-way air controls for the lumbar pads.
- Add just enough air to the lower lumbar area, right where your back naturally arches around the L2 to L4 vertebrae.
- A gentle lift of about 4 centimetres should create soft yet effective support, not stiffness or pressure points.
- Resist the urge to over-inflate, as too much lift pushes your body forward and disrupts the backrest’s correct alignment.
A properly configured lumbar support often feels almost invisible, yet it helps maintain healthy posture for hours.
Step 5 ( Steering wheel and armrest geometry
When you finally get to steering and armrest settings, this is where everything connects. The wrong steering wheel tilt or distance pulls your shoulders forward, and before you know it, you’re rubbing your neck and upper back.
Setting the upper body geometry
To position your arms and shoulders for efficient, relaxed control, start by moving the wheel closer, not farther. Here’s a typical checklist:
- When your hands are at their usual spot on the wheel, your elbows should form a comfortable 90° angle, no strain but no slack, either.
- Keep the steering wheel in line with your chest rather than down near your waist; this reduces upper body fatigue and helps control.
- Adjust armrests so that your forearms are lightly supported and your shoulders stay relaxed and a little lower, never scrunched.
| Adjustment step | Target metric | Primary health benefit |
|---|---|---|
| Height & suspension | Hips above knees, 100mm travel | Reduces spinal shock and vibration |
| Seat pan depth | 3 to 5 cm gap behind knees | Protects popliteal blood flow |
| Backrest incline | 100° to 110° angle | Lowers lumbar disc pressure |
| Lumbar support | Gentle pressure at L2–L4 | Maintains natural spinal curve |
| Steering geometry | 90° elbow bend | Prevents trapezius and neck strain |
The Marco Polo Mobile guarantee: tested for the cabin
All these adjustment steps are practical and straightforward; even in seats manufactured by Marcopolo, you can complete each step in under two minutes. In fact, no special tools or aftermarket gadgets are necessary. Whether your seat features classic mechanical springs or modern air suspension, these ergonomic functions can be set right from the driver’s place, making healthy posture genuinely accessible.
Frequently asked questions (FAQ)
What angle should my truck seat backrest be set to for long-haul driving?
For long trips, your backrest should recline to somewhere between 100 and 110 degrees. This slight backward angle doesn’t just feel more natural, it actually eases the pressure on the lower discs in your back, helping cut down chronic aches that often sneak up over time.
How do I know if my seat cushion is cutting off circulation to my legs?
If the front of your seat feels like it’s pressing into or crowding behind your knees, trouble could be brewing. Look out for signs like tingling, swelling, cold feet, or numb calves. Luckily, ensuring a small 3 to 5 cm space between the cushion and your knees usually prevents these problems.
How do pneumatic suspension seats protect drivers from road vibration?
Pneumatic suspension seats rely on a combination of air bladders and damping elements. Their job is to soak up roughness from the road, especially those vibrations in the 4.5 to 5.5 Hz range, which happen to affect the spine most. Their quiet action is a huge reason why micro-injuries and fatigue are much less of a risk for drivers today.
Should my hips be higher or lower than my knees when driving a truck?
It’s best when your hips are slightly above your knees. This setup encourages your pelvis to tilt forward a little, letting your lower spine keep its healthy curve. When knees rise above hips, the opposite happens: your spine flattens out, and hidden pressure increases on those spinal discs.
Join the connected driver community
When was the last time you changed your truck seat settings on a long route? If you have your own preferred seat adjustments or advice, consider sharing it in the comments, learning from the experience of fellow drivers can often be surprisingly valuable.
Important medical notice
MEDICAL DISCLAIMER: All recommendations and information found here are for learning and reference only. They are not a substitute for advice from your physician or other qualified medical professionals. It is always best to consult your doctor when addressing any specific health needs or conditions.
Making your cabin a healthy, productive space is a smart, ongoing part of being a professional driver. If you treat your seat as a vital health tool, adjustable to your own body’s needs, you actively protect yourself from the daily pressures and aches of life on the road.
Mastering these adjustments is more than a routine; it’s a way of ensuring each kilometre you travel supports your long-term health. With proper set-up, such as those offered in seats by Marcopolo, GRAMMER, or ISRI, you not only boost your focus and control every day, but you also invest in your wellbeing and career resilience far into the future.